Linksys PAP2 Internet Phone Adapter
The Linksys PAP2 Internet Phone Adapter enables high-quality feature-rich VoIP (voice over IP) service through your broadband Internet connection. Just plug it into your home Router or Gateway and use the two standard telephone ports to connect analogue phones or use one of the ports for a fax machine. PAP2 has 2 FXS Ports and 1 RJ45 Ethernet Port.
Configuration Instructions:
- Out of the box you should have the device, an AC adapter, and an Ethernet cable. An analog phone will be required. Plug the AC adapter into the port on the back of the device and the other end to a power source. Connect the Ethernet cable to the blue port on the back of the device with the other end to your router or modem. Finally, connect the analog phone to the green line 1 port.
Before you begin, you must determine what IP address you device received. Do so by picking up the phone attached to the 1st line and dial: **** (four asterisks) then dial: 110 # - you will hear the IP Address read to you.
If your device has been pre-configured, you may want to apply a factory reset or update the device firmware before beginning with this configuration.
- Once you have determined the IP Address, open your web browser and enter the address in this format: http://[yourIPaddress](where [yourIPaddress] is the address that was assigned to your device.
-
Now, switch to Admin by clicking the Admin Login in the top right corner of the page. Click on Line 1 for the next screen.
- In the next steps, you will enter your the trunk registration information provided in the provisioning letter you received from IP Communications
Depending on the registration type you requested at signup, there are two ways that you can register your device. You will either use (4a.) IP Address authentication or (4b.)SIP Username/Password Authentication. NOTE: You will only use one of the following registration methods.
IP ADDRESS AUTHENTICATION:
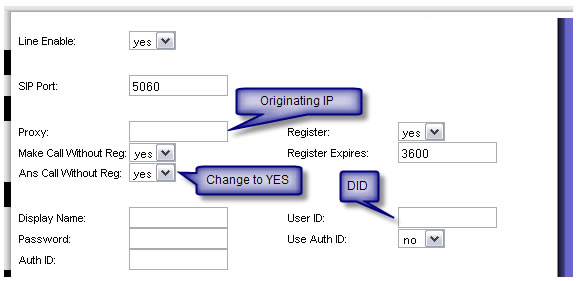
4A. To configure your device with IP Address Authentication, from factory default, you will need to change the following fields:
From the default configuration, you will only need to modify the following fields:
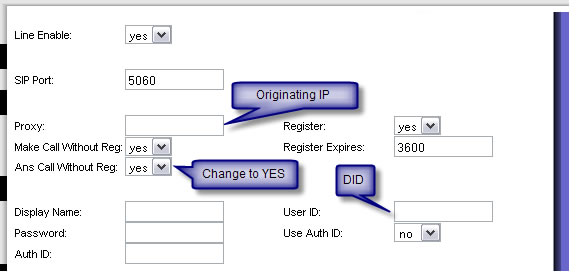
Proxy: Origination IP (from provisioning letter)
Make Call Without Reg: yes
Ans Call Without Reg: yes
Register:yes
Display Name: Your Name
User ID: "enter your DID here"
Auth ID: "leave blank"
Password: "leave blank"
Name: Your Name
 |
Click Save Settings. The device will reload and bring you back to the main page. From here switch to advanced view and click SIP.
At the bottom of the page, enter your Public IP address in the EXT IP: field. Click Save Settings and the device will reload. You are now ready to receive calls. If you require more assistance, please contact the technical support team.
4B. For SIP Username/Password authentication, From factory default, you will need to change the following fields:
From the default configuration, you will only need to modify the following fields:
Proxy: SIP Domain/Proxy (from provisioning letter)
User ID: Enter the SIP Username (from provisioning letter)
Auth ID: Enter the SIP Username (from provisioning letter)
Password: SIP Password (from provisioning letter)
Name: Your Name
 |
Click Save Settings at the bottom of the page. The device will reload automatically and take you to the main page. You should now be able to receive calls. These settings are the same if you have outbound service with TalkinIP. If you require more assistance, please contact the technical support team.
